Lerna monorepo with TypeScript incremental builds
Looking to build a modular application using TypeScript in an easy to manage format? This article has got you covered.
A monorepo as you are likely aware is a project structure that allows you to easily share packages of code within a project. A basic JavaScript monorepo is fairly easy to get going but using TypeScript requires some additional configuration.
In this article, you will learn how to:
- Initialize a Lerna repository
- Create multiple packages that can be imported
- Setup TypeScript with incremental builds
- Compile our TypeScript packages
You do not need to be familiar with Lerna to follow this tutorial.
See example GitHub repo
If you would like to see a complete working example, check out the following GitHub repo.
Inspired by
This tutorial was heavily inspired by this Medium post.
However, I ran into a lot of issues following that article and felt that it contained a lot of unnecessary extras.
So I spent some time researching and experimenting with how to create a good TypeScript monorepo with Lerna. This is what I've found.
Install Lerna
Let's start by installing Lerna globally.
npm install -g lernaCreate monorepo folder
Next, we will create our monorepo project folder and navigate to it.
mkdir project
cd project
Initialize Lerna
Inside the project folder, we will initialize our Lerna monorepo. Be sure to read about the two different modes that lerna offers before initializing your repo.
lerna init
npm install
After this, Lerna will have created the following inside your folder:
project
├── packages/
├── lerna.json
└── package.json
As you can expect, the lerna.json file contains the Lerna configuration for this repo. By default, any folders containing a package.json file within the packages folder will be registered as a package with Lerna.
Setup ignore file
I recommend creating a .gitignore file in the root of your monorepo with the following contents:
node_modules
dist
tsconfig.tsbuildinfo
The tsconfig.tsbuildinfo file is used for incremental TypeScript builds and will be explained further in this article. It's safe to delete this file and should not be committed to your VCS.
Install TypeScript
Next, let's install TypeScript in our monorepo. This can be shared across all your dependencies if you are executing commands from the root of your monorepo or using lerna run. It's also useful to do this as our IDE will likely check our root node_modules for the TypeScript package.
To run TypeScript from within an individual package, you will still need to install it into each package's dependencies.
Run the following command in the root of your repo:
npm install --save-dev typescriptBase TypeScript configuration
Once that is done, let's configure our base TypeScript config file. Create a tsconfig.json file in the root of your monorepo. Below is a good base configuration file to work with TypeScript in a monorepo.
{
  "compilerOptions": {
    "composite": true,
    "outDir": "./dist",
    "rootDir": ".",
    "declaration": true,
    "noImplicitAny": true,
    "esModuleInterop": true,
    "module": "commonjs",
    "target": "es6",
    "lib": ["es6"]
  },
  "exclude": ["node_modules", "dist"]
}
The important setting to note in our config is composite which is set to true. This setting is required when using project references in TypeScript. We will be using this together with incremental builds to link our dependencies and optimize our builds.
Setup packages
Now let's create two separate packages, an application and logger. Create the following folders and files so your monorepo looks like this:
project
├── packages/app/src/index.ts
├── packages/app/package.json
├── packages/app/tsconfig.json
├── packages/logger/src/index.ts
├── packages/logger/package.json
├── packages/logger/tsconfig.json
├── lerna.json
├── package.json
└── tsconfig.json
Each package contains 3 files, src/index.ts, package.json and tsconfig.json. Copy and paste the relevant code from below into each file.
Logger package
{
  "name": "logger",
  "version": "1.0.0",
  "main": "dist/index",
  "types": "dist/index",
  "files": ["dist"],
  "scripts": {
    "build": "npm run clean && npm run compile",
    "clean": "rm -rf ./dist && rm -rf tsconfig.tsbuildinfo",
    "compile": "tsc -b tsconfig.json"
  },
  "devDependencies": {
    "typescript": "^3.5.3"
  }
}
{
"extends": "../../tsconfig.json",
"compilerOptions": {
"outDir": "./dist",
"rootDir": "./src"
},
"exclude": ["node_modules", "dist"]
}export default function logger(message: string) {
console.log(message);
}Application package
{
  "name": "app",
  "version": "1.0.0",
  "scripts": {
    "build": "npm run clean && npm run compile",
    "clean": "rm -rf ./dist && rm -rf tsconfig.tsbuildinfo",
    "compile": "tsc -b tsconfig.json"
  },
  "dependencies": {
    "logger": "1.0.0"
  },
  "devDependencies": {
    "typescript": "^3.5.3"
  }
}
{
"extends": "../../tsconfig.json",
"compilerOptions": {
"outDir": "./dist",
"rootDir": "./src"
},
"references": [{"path": "../logger"}],
"exclude": ["node_modules", "dist"]
}import logger from "logger";
logger("Application started");package.json explanation
The package.json file designates the package details. The name provided in this file will determine the name used to import the package. You can also choose to scope all your package names with @project/name.
The main field must point to the commonjs build of our package source to be imported. types specifies the location for this package's type definitions (automatically generated when compiling).
We have not included the main and types field in our application package.json. This is because both main and type are not required if the package you are building is not something that will be imported or published. For example, if it was an application server that will be built and deployed manually, it wouldn't be needed.
The scripts are pretty self-explanatory. The only important thing to highlight is we are invoking TypeScript with -b which uses build mode. This enables incremental builds which can significantly speed up compile time.
To facilitate this, when TypeScript runs in build mode, a tsconfig.tsbuildinfo file is produced. This file can be safely deleted but it will cause TypeScript to rebuild all dependencies. That is why the clean command removes this file to create a fresh build.
You would likely want to use the build command when creating a fresh build for deployment. The compile command can be used in development for rapid builds.
Finally, we must specify our project dependencies. We have included typescript as a dev dependency so we can invoke it easily when within that package folder. For our application, we also included logger as a dependency so we can import it within our code.
tsconfig.json explanation
This is straight forward, we start by extending our base config file in the root of our monorepo.
We only need to override the outDir and rootDir in our options. Make sure to also add exclude again to prevent TypeScript from picking up on our package output and node_modules.
In our application tsconfig.json, you will notice the references setting. This is key to incremental builds and points TypeScript to the location of our logger package.
You will need to add a new reference for every package you import within your monorepo. If this sounds too annoying, I will explain at the end of the article how to remove incremental builds to avoid this step.
Bootstrap dependencies
Before building our application, we must first install our dependencies. To do this in our monorepo, we will use lerna boostrap. This command will:
- Install all our external package dependencies
- Create a symlink between local package dependencies inside the relevant node_modules folder
- Run npm
prepareandprepublishinside all local packages
You must run this command instead of npm install or yarn every time you add, remove or modify your dependencies. Let's go ahead and run it.
lerna bootstrapBy default, this command will use npm not yarn. To use yarn instead, see the bootstrap command documentation.
Compile TypeScript
At this point, you are ready to compile your TypeScript. There are 2 ways you can do this. First, you can use lerna run to execute a script inside each package. Or you can navigate into each package and run the build or compile command.
To start let's run the following in the root of our monorepo
lerna run compileThe logger and application packages would have now been compiled from TypeScript. Lerna will make sure to build logger first since application depends on it.
Now let's run it one more time.
lerna run compileNotice how the second time around, the build time was reduced significantly since TypeScript didn't need to rebuild the packages as no changes were made.
You can learn more about the Lerna run command at the run command documentation.
You can also navigate to an individual package and compile it as follows:
cd packages/app
npm run compile
Extras
IDE saying imported package not found
This seems to happen consistently for me with Webstorm after a clean build where the local package dist folder is deleted. It seems Webstorm is not picking up on the new dist folder being created for some time.
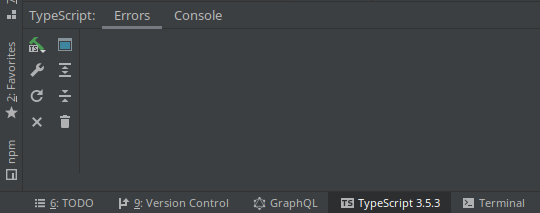
The solution was to restart TypeScript for the IDE. In Webstorm, you can do this by pressing TypeScript x.x.x at the bottom to open the control panel. On the left, press the circular refresh icon to restart TypeScript.
Disabling incremental builds
Don't like the idea of manually referencing packages in each package tsconfig.json or don't want incremental builds?
You can use the default TypeScript build process by doing the following:
- Remove
referencesfrom your individual packagetsconfig.json - Remove
compositesetting from your monorepo basetsconfig.json - Change
compilescript inpackage.jsontotsc -p tsconfig.json
After that, you will be using the default compile process for TypeScript.
Conclusion
This is all you need as a base TypeScript monorepo. You can expand on it and customize it to your needs. If this can be improved in any way, let me know and I will add it to the article.
If you need more clarity, check out the GitHub repo for this tutorial.
Comments